Hands up who’s stared at women with epic dutch braids and thought: ‘How did you manage to do that??’
Yup, us too.
Generally speaking, a messy top knot is all our Monday morning brains can manage, and that’s on a good day.
Until now. Determined to master fashion’s favourite braid style, we turned to pro hairstylist and the man behind J Lo and Kim K’s A-list ‘dos, to pick his brains on how to master doing a dutch braid on yourself, without losing the will to live.
Read on for his step by step tutorial to creating your best single dutch braid ever…
How To Do A Dutch Braid
Step 1
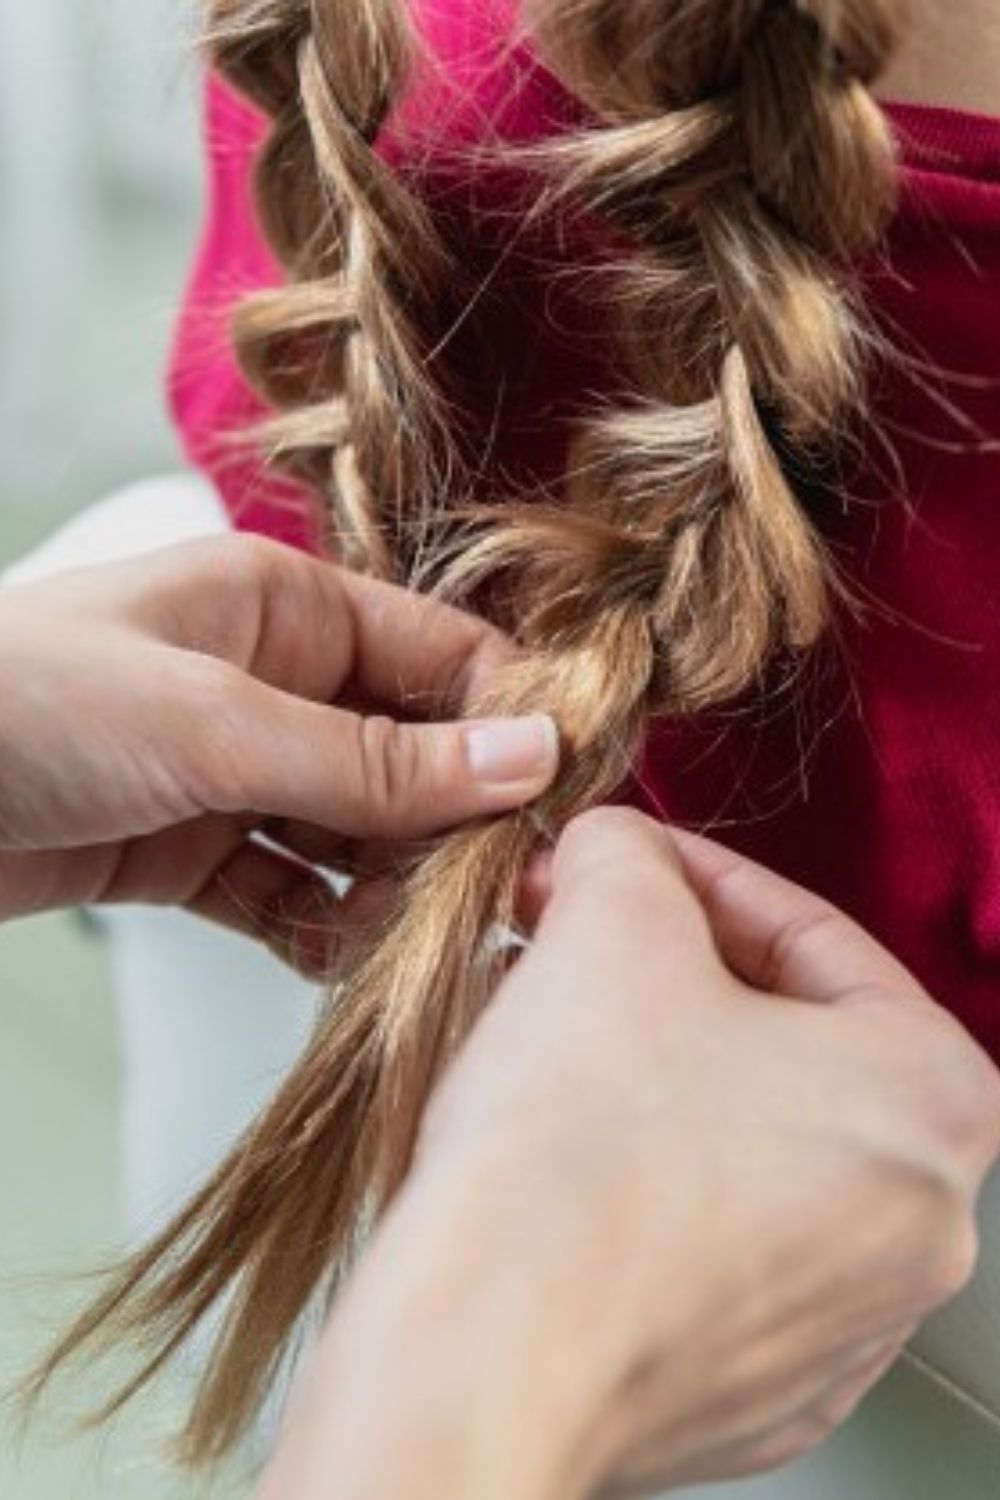
Take a section of hair at the front of your head and split into three inch wide pieces ready for plaiting. The closer the section of hair is to your hairline, the higher up your plait will start.
Step 2
Start to weave the pieces like a regular plait, but this time instead of plaiting the outside pieces of hair inwards, you want to pull the middle section out and over, swapping it with one of the side pieces, alternating either side as you go.
Middle piece swaps over the right, so the right piece sits in the middle.
Then the middle piece swaps over the left, so the left piece sits in the middle.
Step 3
Work your way towards the back of your head making sure you pull in hair from each side as you go. Each time the hair should feed in and add to the section being folded into the middle, so that the plait becomes bulkier as you go and starts to form one plait that sits on top of your head.

