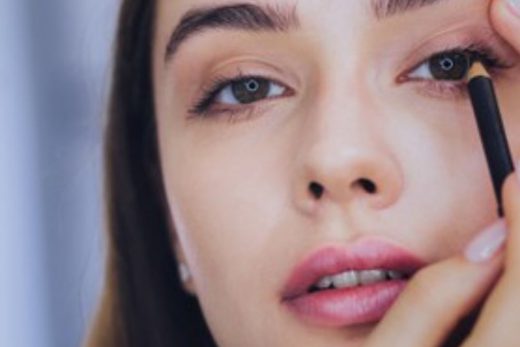
You don’t need to show your face more proportional Photoshop! Your face may indicate that the right technique is more defined makeup, the little tricks you can achieve your ideal makeup with image. This makeup is one of the techniques hundred to conture. To conture face on your face, you don’t want to be left in place where you want the shadows to the forefront is the process of removing.
To conture face, preferably at a slight angle (dashed) triple facial straight threesome with a brush or blush can be applied with a brush. Stroke bronzer or blush may be used. This tone is very important. The stroke selected for tone, skin color should be dark as 2 tons. Won’t look much more natural dark tones for when making the stroke is not used. You are also using of the product must be matte. Bright, silvery and glittery colors with this process does not apply.
How To conture Face?
*This process varies according to The Shape of your face. For this reason, you should look at your face before to conture the process. Your face is round, square, Square, is that you must learn. Contouring your face is more oval, which is ideal to give the picture.
To conture face shape:
Round Face: If you have a shape like a facial, your face is longer and thinner side portions golgelendirmel vertically to show you. Starting from the jaw line upward you apply the bronzer and thoroughly spread.
Square Face: Such a facial if you have a shape at the bottom of your cheekbone, you must golgelendirmel the side of the jaw bone.
Heart Shaped Face: Heart-shaped if you have facial lines, your forehead is larger than the bottom of your face. For this reason, the shading process is applied to the forehead. You golgelendirmel the side portions of the forehead, jaw you should stay away from the parts. The process to conture your hair as much as you can.
You innate if you have an oval face just under your cheekbones to make your face look thinner shade.
Besides these if your nose is more than a little bronzer on the sides of your nose if you want to show every side 2 Apply. Follow this procedure if you want to look more upturned nose under your nose. Avoid touching the tip of the nose. If your lines sharp if you want to look more to conture facial illuminator of the process for the next use. Stroke starting from the front of the nose and the forehead region and driven towards your integrity will provide enlightening. At this level, and again under the lip illuminator you can apply to your left and right side.
Lighting is where you want to stand out of the places we’re going to do. The illuminator will be used in the locations where the light of day when we came into the light on our faces hit the high points. With a properly organized to resemble the contours of your face that you want to konturlerme the process is quite easy. Broadcast your plenty of natural shading of this process to a halt, stay away from the appearance of a dashed line.


