You can paint a room—or you can paint a room really well. If you want to go beyond the norm and learn how to paint a room with true perfection, one that is neat, clean, and which looks fantastic, you need to think like the masters of the craft: professional painters. Painting a room like a professional hinges on the quality of the tools and the quality of preparation.
Invest in Quality Tools
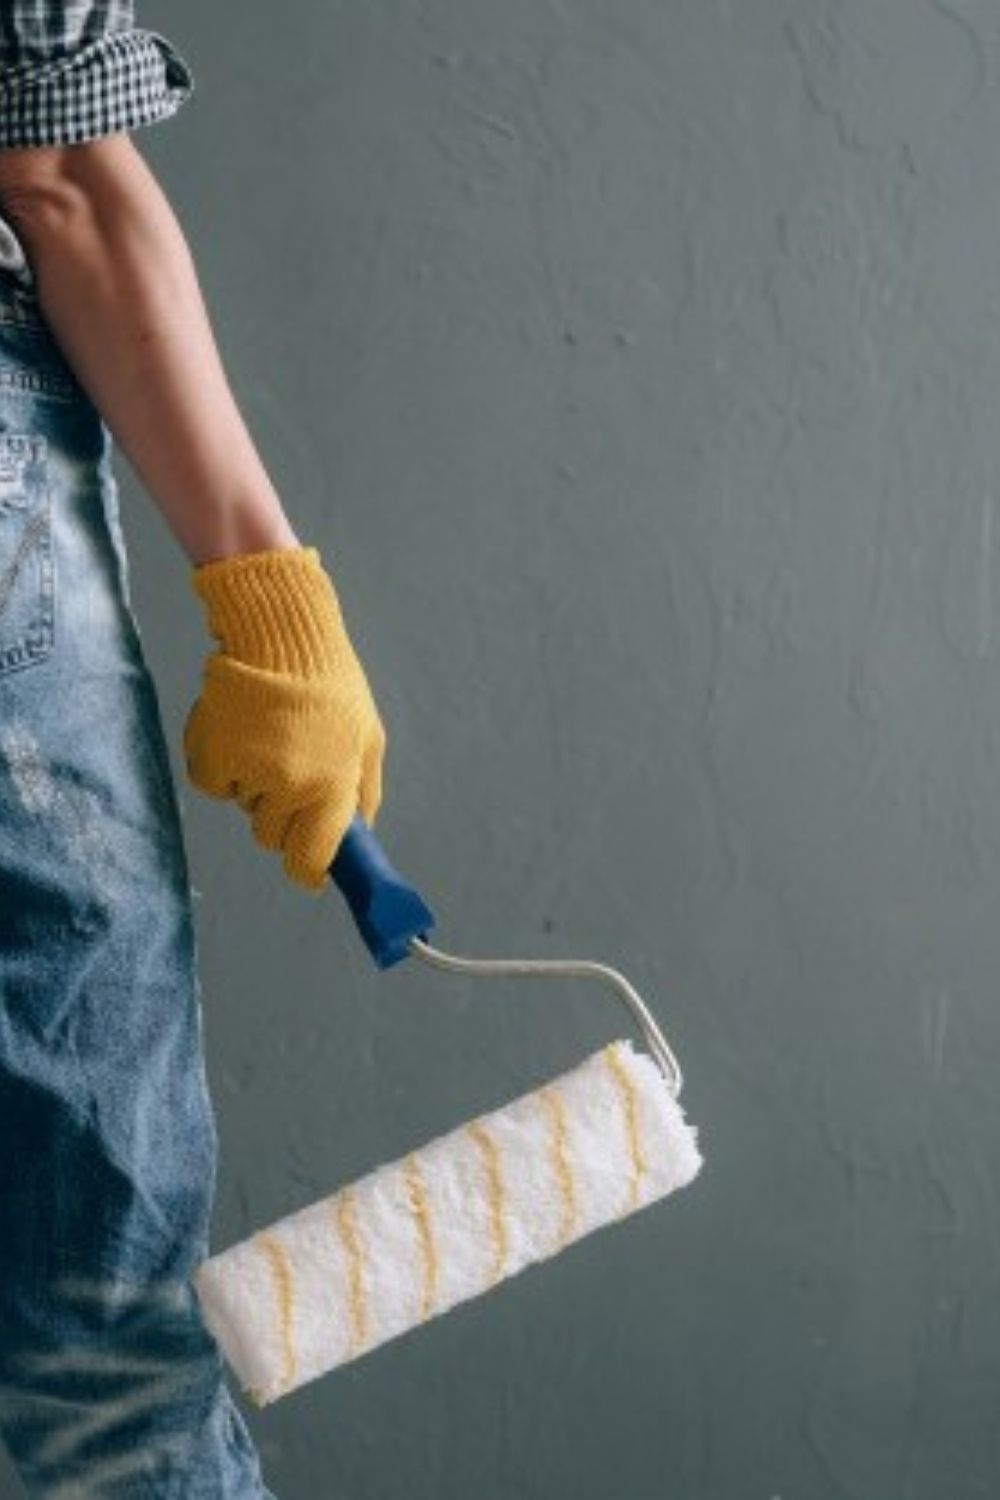
Professional painters work with premium tools, and they maintain them well because these tools are their livelihood. Duplicate a professional job on a do-it-yourself basis by investing in the proper tools:
Premium brushes won’t shed bristles.
A premium roller frame (9 inches and smaller sizes) will last for several projects.
A quality roller cover with a thick nap absorbs and transfers paint to your wall with consistency; pros tend to use a new roller cover for each coat of paint.
An extension pole with a locking mechanism helps you paint high places with less mess.
A 5-gallon paint bucket eliminates the paint tray and liner method by letting you easily refill your roller. A lid on the bucket lets you store paint for long periods and eliminates pouring paint back into original cans.
A roller screen put in the bucket drains paint back into the container eliminating waste and mess.
Don’t Skimp on Prepping
There are a few phases to prepping walls for paint. The first phase involves moving as many items out of the room to clear the space around the walls for further preparation. Items left in the room only block your work and potentially can be damaged by paint splatter and spills. If you can’t move furniture, then gather everything to the center of the room. Cover all of the furniture under one large plastic sheet and tape the sheet down with painter’s tape. Then take down anything decorative from the walls such as artwork, shelves, clocks, and finally remove the nails, hooks, and picture hangers. Now you’re ready for the next steps to painting a room.
Select Room Shape
Calculate Square Footage ?
8 Essential House Painting Supplies
What You’ll Need
Equipment / Tools
Flathead screwdriver
Paint scraper (with rounded corners)
Putty knife
Clean bucket
Sponges
Angled paintbrush or paint edger tool
9-inch roller frame
9-inch roller cover(s)
5 gallon paint bucket
Bucket screen
Roller extension pole (optional)
Materials
Plastic sandwich bags,
Painter’s tape,
Plastic sheeting,
Drop cloths,
Fine-grit sandpaper,
Wall spackle,
TSP
Primer
Interior latex paint
Instructions
Remove and Prep Switch Plates and Outlet Covers
Turn off the electrical circuits controlling the outlets and switches in the room you’re painting. You do not want to be electrically shocked when removing plates and screws.
With a small screwdriver, remove all the switch plates and outlet covers. Place each plate and cover, with their screws, in a separate plastic sandwich bag. Put the bags in a safe place away from the paint. Place a strip of blue painter’s masking tape over the outlet and switch openings in the walls to avoid painting over them by accident.
Brighten Dirty Plates and Covers
If the covers were looking dingy, place them in a solution of warm soapy water to clean them while you are painting. Replace cracked or broken plates and covers.
Cover Floor and Unmovable Items
Lay drop cloths, such as plastic tarps or rosin paper on the floor to protect it from paint.
Rosin Paper
Rosin paper works best on hardwood floors, as plastic sheeting can create a slippery surface. Rosin paper comes in rolls at the hardware store or you can purchase inexpensive builder’s paper.
Mask or Remove the Trim
Run painter’s tape along the edges of door and window trim to protect them from paint (and from any patching materials). Remove baseboards if possible. Otherwise, run painter’s tape along the top edge of the baseboards to protect them from paint.
Baseboard Prep
Clean the top edge and surface of baseboards to help the tape stick.
Patch the Walls
Before cleaning, you’ll need to examine the walls for any gouges, large holes, scratches, cracks, or peeling. Patching a wall well will create a smooth and professional paint finish.
Use fine-grit sandpaper to smooth over minor shallow scratches and imperfections. Scrape off any old peeling paint with a paint scraper for walls. Smooth over and feather edges of scraped paint with sandpaper. Spac
Rubber gloves
Safety eye goggles
Long sleeves
If TSP gets on your skin, wash the area with soap and water. If it gets in your eyes, flush with clean water for 15 minutes. Then seek emergency medical care.
Prime the Walls
Priming walls covers tough stains and adds a subtle texture, or teeth, so the paint can better adhere to the walls. Oil-based primers are ideal to use for most interior walls. If your walls are in pristine and stain-free condition, consider self-priming paint to eliminate the step of priming.
Primers are formulated for various uses. For example, if the TSP did not remove some stains, take the next step with an oil-based masking primer. Look for primers that indicate that they will block or mask stains from seeping through the paint; keep priming these areas until the stain disappears.
When To Use Tinted Primer
Use a tinted primer if you are painting a light color on a dark wall. You can use a tinted primer if you are painting over a wall with a similar color, as well. Tinted primer lets you see missed spots when painting your finishing coat.
Cut-in the Edges
Cutting-in is a term that refers to painting right up to the edge of surfaces that will not be painted and it fills in areas where paint rollers can’t go. Professional painters prefer cutting-in, sometimes instead of painter’s tape, because it is expedient, inexpensive, less wasteful, and cleaner than using the tape.
Lightly dip an angled brush or paint edger tool into the top of the paint. Gently draw the brush along the wall and up close to the surface that will not be painted (such as door trim). Go slowly when using an angled brush or paint edger tool. Have a cloth rag to quickly clean up errant paint marks.
Prepare Roller With Paint
Dip the roller into your paint bucket. Don’t immerse it for too long; overloaded rollers cause major drips that are tough to roll out.
Pull the roller back up the screen several times until the roller is coated all around. Keep rolling up and down until you hear a sticky sound. Do this several times until you are confident that the roller cover is coated in paint.
Roll in a W Shape
Start in one corner of the wall and make a 3-foot downward pass, then up again, down, and finally up to create a “W.” Fill and overlap other W shapes across the wall. Work quickly enough so the paint edges you are rolling over are still wet.
Why a Use Wet Edge?
Flat and matte interior paints are forgiving when it comes to painting over drier edges. However, if you are using glossy paint, pay close attention and always roll or brush from wet edges to ensure a smooth finish.
Fill In and Complete
Continue rolling out blocks of paint using the W method. Occasionally step back to view your work. Work in a strong light to catch any missing spots.
At any edges where you previously used the cutting-in technique, finish by turning the roller vertically or horizontally to fill in the space with paint and smooth it out.
Avoid Roller Splatter
While painting, stay as far away as possible from areas you don’t want painted. Rollers can accidently splatter and spray paint off the roller and onto the surface.


