Hanging drywall is a crucial skill that you keep returning to over and over when you remodel a house. With a small financial investment, you can substantially alter the look of an unfinished space, such as a garage or basement, in little time. Successful drywall installation hinges on correctly anchoring the drywall panels to the framing members. Once you master the technique of hanging drywall, you can inexpensively finish rooms.
Made largely of the mineral gypsum, drywall is a considerably large, heavy, and unwieldy building material. Consider purchasing an inexpensive plastic drywall carrier that allows you to hold the drywall sheet at your side without twisting your arm. Although you can install drywall by yourself, the job will be much easier if you have a helper or two, especially if you are covering the ceiling. After hanging panels, you will need to finish the joints, which will likely include wet-sanding as a way to reduce the copious amounts of dust that drywall and drywall compound creates when sanded. Hanging drywall is a labor-intensive project, and it’s only part of the job.
What You’ll Need
Equipment / Tools
- Cordless drill,
- Step ladder,
- Hammer,
- Tape measure,
- Drywall square,
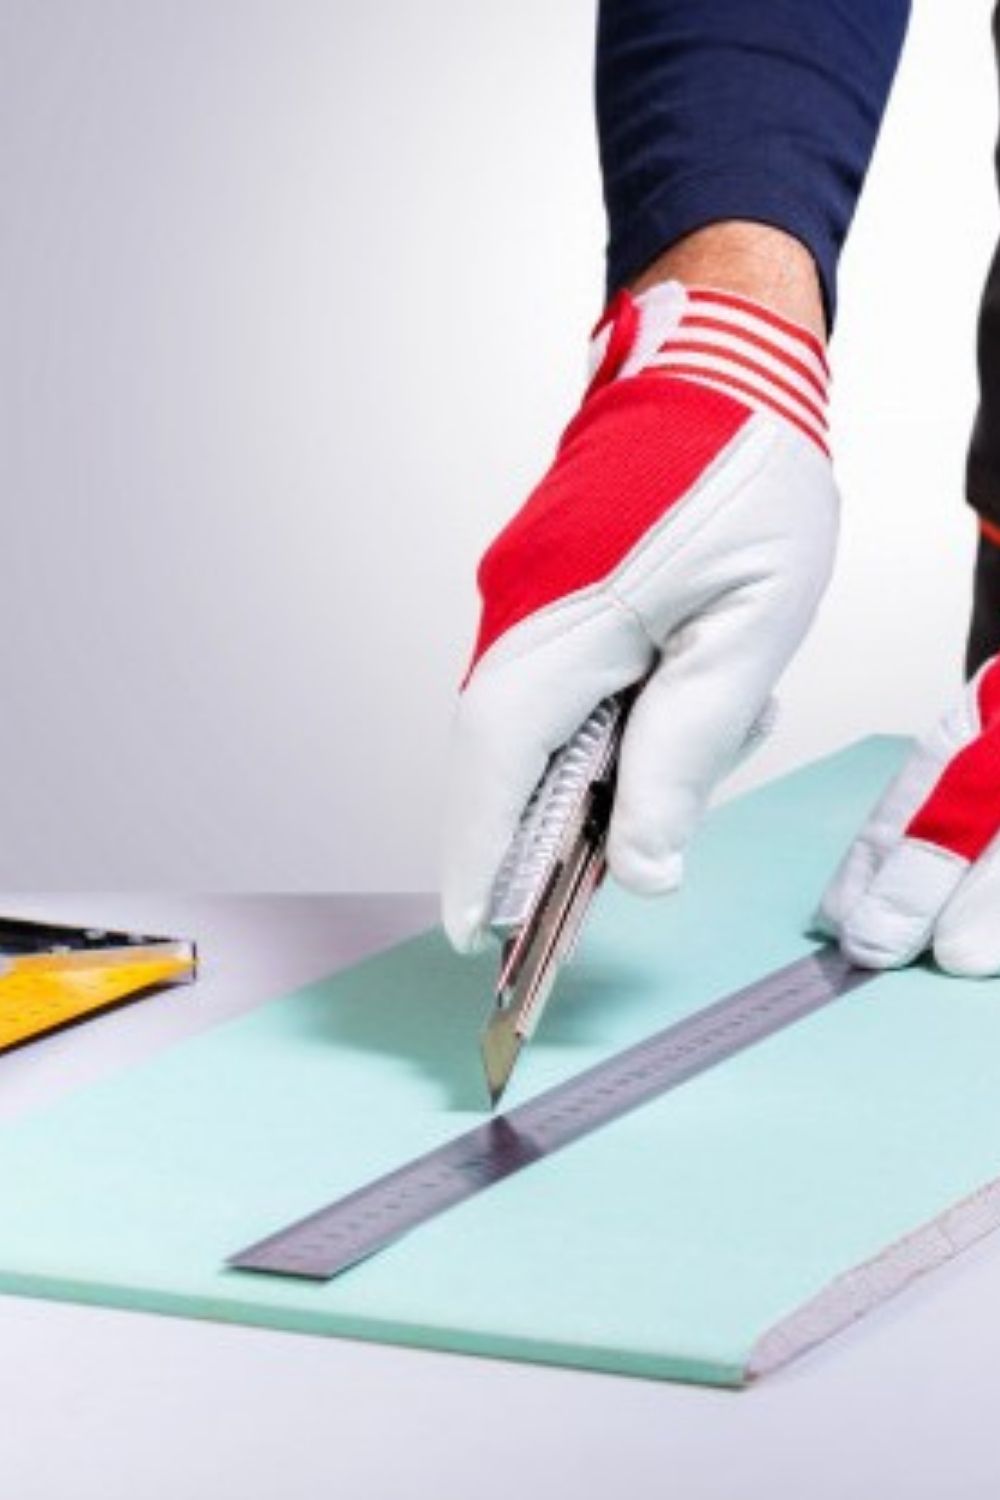
- Utility knife,
- Level or long straight board (optional)
- Planer/power planer (optional)
- Drywall lift
Materials
- Drywall sheets
- Drywall fasteners (screws or ring-shank nails)
- Shims
- Wood glue or hot glue
Instructions
- Check the Wall Studs
Before you start hanging the drywall, check the studs and joists for bows or twists. The finished walls will look best if the studs are as flat as possible.
Visually inspect the studs or joists to see if they are aligned in a straight plane. To confirm alignment, hold a long, straight board or level across the framing. If any framing members stick out, trim them with a saw or a power planer (especially for a large installation). Then, fill in low spots with shims attached with nails or glue.
Run the head of the hammer up and down the studs (for remodels, not new-construction drywall installation) to check for stray screws or nails that will impede the drywall. - Choose a Drywall Fastener
Drywall is attached to framing with drywall screws or nails. Drywall screws are the fastener of choice for most drywall installations. Drywall screws have a fluted head designed to recess slightly below the surface of the drywall paper without breaking it, and coarse threads for the best hold in the gypsum core of the drywall. Screws can be driven faster than nails, with less chance for damaging the face of the drywall; they also hold the drywall to the framing better than nails.
Drywall nails do have their place, though. If you need to install a large amount of drywall quickly, drywall nails go in considerably faster than drywall screws. Both options follow in the next steps. - Option for Driving in Screws
Use the same process for screwing in drywall panels on the ceiling and on the wall.
Screws need to be driven below the surface of the drywall so that they can be covered with joint compound and sanded to create a smooth surface. Do not drive them in so deep as to tear the paper surface and damage the gypsum core. Once the paper is torn, much of the holding power of the fastener is lost.
A properly driven fastener is slightly countersunk beneath the surface. Screw depth can be controlled on a cordless drill with an adjustable clutch. Screws should penetrate the framing at least 5/8-inch, which means that easy-to-find 1-1/4-inch screws will suffice for both 1/2-inch and 5/8-inch drywall panels.
Tools for Screws
For do-it-yourselfers, the best tool for attaching drywall is a cordless drill with an adjustable clutch. Or you can use special drywall screw bits that fit into a drill chuck. These bits are designed to stop turning when the screw hits the desired depth. - Option for Driving in Nails
As with screws, nails need to be driven below the surface of the drywall so that they can be covered with joint compound and sanded to create a smooth surface.
Hammering drywall nails can actually be a more forgiving technique than driving drywall screws. Drywall screws tend to rapidly penetrate the drywall paper and tear through instantly. But with hammering, the broad, smooth head of the hammer allows for several errant blows before the paper tears. Use the same process on ceiling and wall panels.
Use a hammer that has a curved face which will leave just a small dimple around the nail head. Use ring-shank drywall nails only, as these have a broad head that helps hold the drywall in place. Nails should penetrate the framing at least 3/4 inch. - Hang the Drywall on the Ceiling
If you are covering both walls and ceiling with drywall, begin with the ceiling.
When attaching drywall to ceiling joists spaced 16 inches on center, fasteners should be spaced 12 inches apart. With wall studs, the maximum spacing between fasteners should be 16 inches. Drive screws or nails into each stud beneath the panel. Attach fasteners every 8 inches along the untapered edges, but keep them at least 3/8 inch from the edge to avoid damaging the gypsum core.
If using nails, plan to drive a second nail 2 inches from the first at each fastener location, along the face of the drywall. - Prepare to Place Drywall on the Walls
After covering the ceiling with drywall, you will attach the top sheets of drywall to the wall. When installing drywall that is horizontally-oriented, start with the top and work your way down. The idea is to make your cut side facing the floor, where it will be later covered up with baseboards.
Mark the locations of the wall studs on the edges of the ceiling drywall with a pencil. This will make it easier to find the stud centers when driving screws into the wall panels. - Lift Wall Panels Into Place
Once the stud locations have been marked, you will use a drywall lifter to place panels into position.
When installing top panels on a wall, rest the panel on screws driven temporarily into the studs about 50 inches below the ceiling. Use a drywall lifter to place the panel into place on the screws. Then quickly grab your screw gun or drill in one hand while sliding the panel up with your other hand and shoulder. Drive a screw at the bottom of the panel into a center stud, then work your way out and up the panel.
Continue to lift each panel into place on the screws. Continue to grab your drill in one hand while sliding the panel into position with your other hand and shoulder.
Bottom panels should fit snugly against the top panels. Use your drywall square to cut pieces to fit.
DIY Drywall Lifter
Rent or create a DIY drywall lift. Make two cheap and easy braces by attaching a 4-foot-long piece of 2-by-4 lumber to a full-length piece of a 2-by-4 “leg.” This T-shaped brace should be about an inch taller than the height of the ceiling to hold the panel up to the right spot. Make two of them, but an assistant will be needed to maneuver the drywall lift.


